The second and last part of this article continues with the installation of the high-end audio sound system in the customer’s house. We also discuss several aspects of service and repair, as well as quality control management. The article ends with a recap of the most important points from part I and II.
In the second part we will take a closer look at the installation and repair & service processes:

The first part covered Quality Control (QC) – you have missed it? No problem, get to first part to catch up before reading on!

4) Installation
All the efforts of manufacturing a perfect high-end audio system can become worthless when the system is used in an environment that is not suitable for listening. There are three room-acoustic core parameters to watch:
a) Reverberation
Too much reverberation in a listening room can ruin the listening experience. On the contrary, an absence of reverberation is also not pleasing to the ear. The optimum reverberation depends on the room size. For typical living room size applications, an RT time of 0.3 – 0.5s in all frequency bands is recommended. The RT measurement uses either a gated pink noise signal, applied to the sound system, or an impulsive sound, such as a bursting balloon.
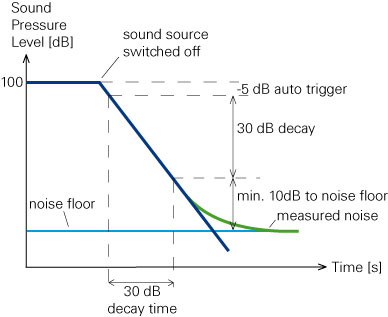
RT Time
b) Room reflections
Low frequencies / standing waves
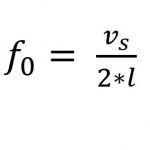
The room resonance frequency can be calculated:
Whereby:
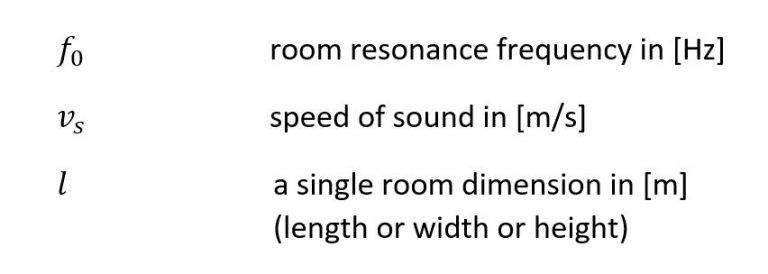
For typical living room sizes, resonance frequencies will appear in the range of 20 Hz to 100 Hz. The presence of room resonances can be measured by applying the room resonance frequency to the sound system, and then measuring the acoustic level at different positions in the room. If the measurement varies greatly, low frequency reflections are present and need to be eliminated by applying appropriate acoustic treatments, for low frequencies, to the room.
Mid and high frequencies
Reflections of mid and high frequencies appear as a comb filter effect. This effect is not only audible, but also easily measurable. To identify comb filter effects in a room, white noise is applied to the sound system. Then, the spectrum of the sound is measured in the room, using a high-resolution FFT. When the spectrum of the room with a linear-scaled X-axis shows equidistance notches, this is an indication of room reflections.
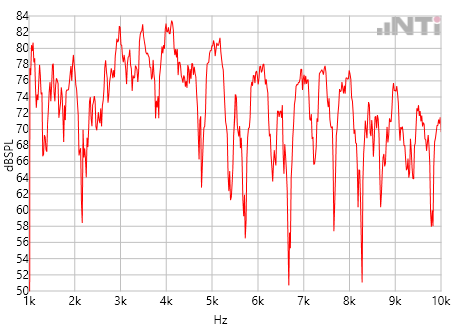
Comb filter FFT spectrum
(c) Ambient noise
Since high-end system are supposed to reproduce every little detail of the original sound, overlapping hum or noise from the environment can be disturbing. The ambient noise can be measured as a simple A-weighted sound level reading.
A more sophisticated way is to use noise curves measurements. Noise curves map the sound level in each octave band against loudness curves where each band is perceived equally.
Recommended NC level values for Recording Studios, Concert halls and similar listening applications are NC 15-20.
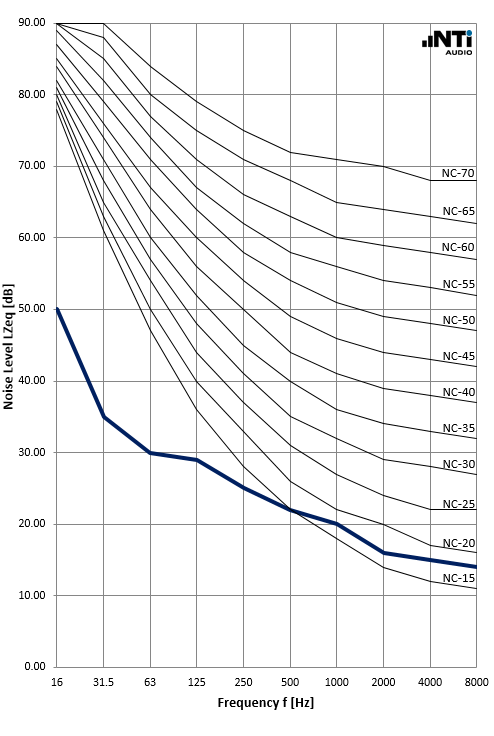
NC (Noise Criteria) curves
5) Repair & Service
In case of repair or service of a high-end audio system, the existing set of measurements from manufacturing QC testing can be applied to identify a faulty system component. Usually the failed measurement indicates the type of failure. When fault diagnostics on circuit board level is required, an audio analyzer with standard functionality such as level, distortion and FFT is most useful.
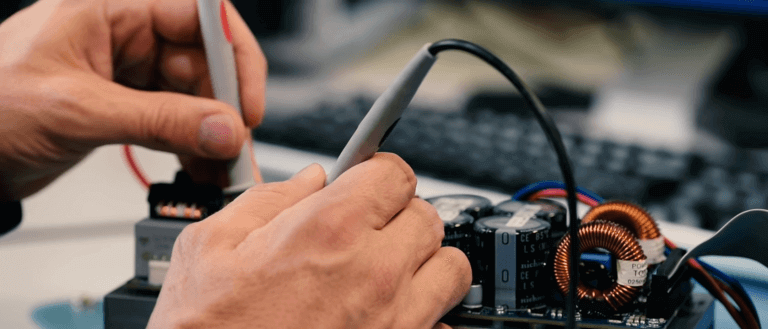
Trouble-shooting in an electronic lab
When critical parts are exchanged, it is important to match the characteristics of the replaced part.
After the repair, the regular device tests defined before are performed for the repaired device. Before shipping, the manufacturing QC system test is executed.
6) Quality Control Management Aspects
a) Test environment
For acoustic measurements in the R&D, incoming QC and manufacturing QC, an acoustically-stable test environment is the foundation for reliable and reproducible test data. Exact positioning of all loudspeaker models as well as the measurement microphone are crucial. Ambient noise should be held as low as possible. Reflections from room boundaries or obstacles must be covered with acoustic treatment material, or managed by the test system by applying time-window functionality.
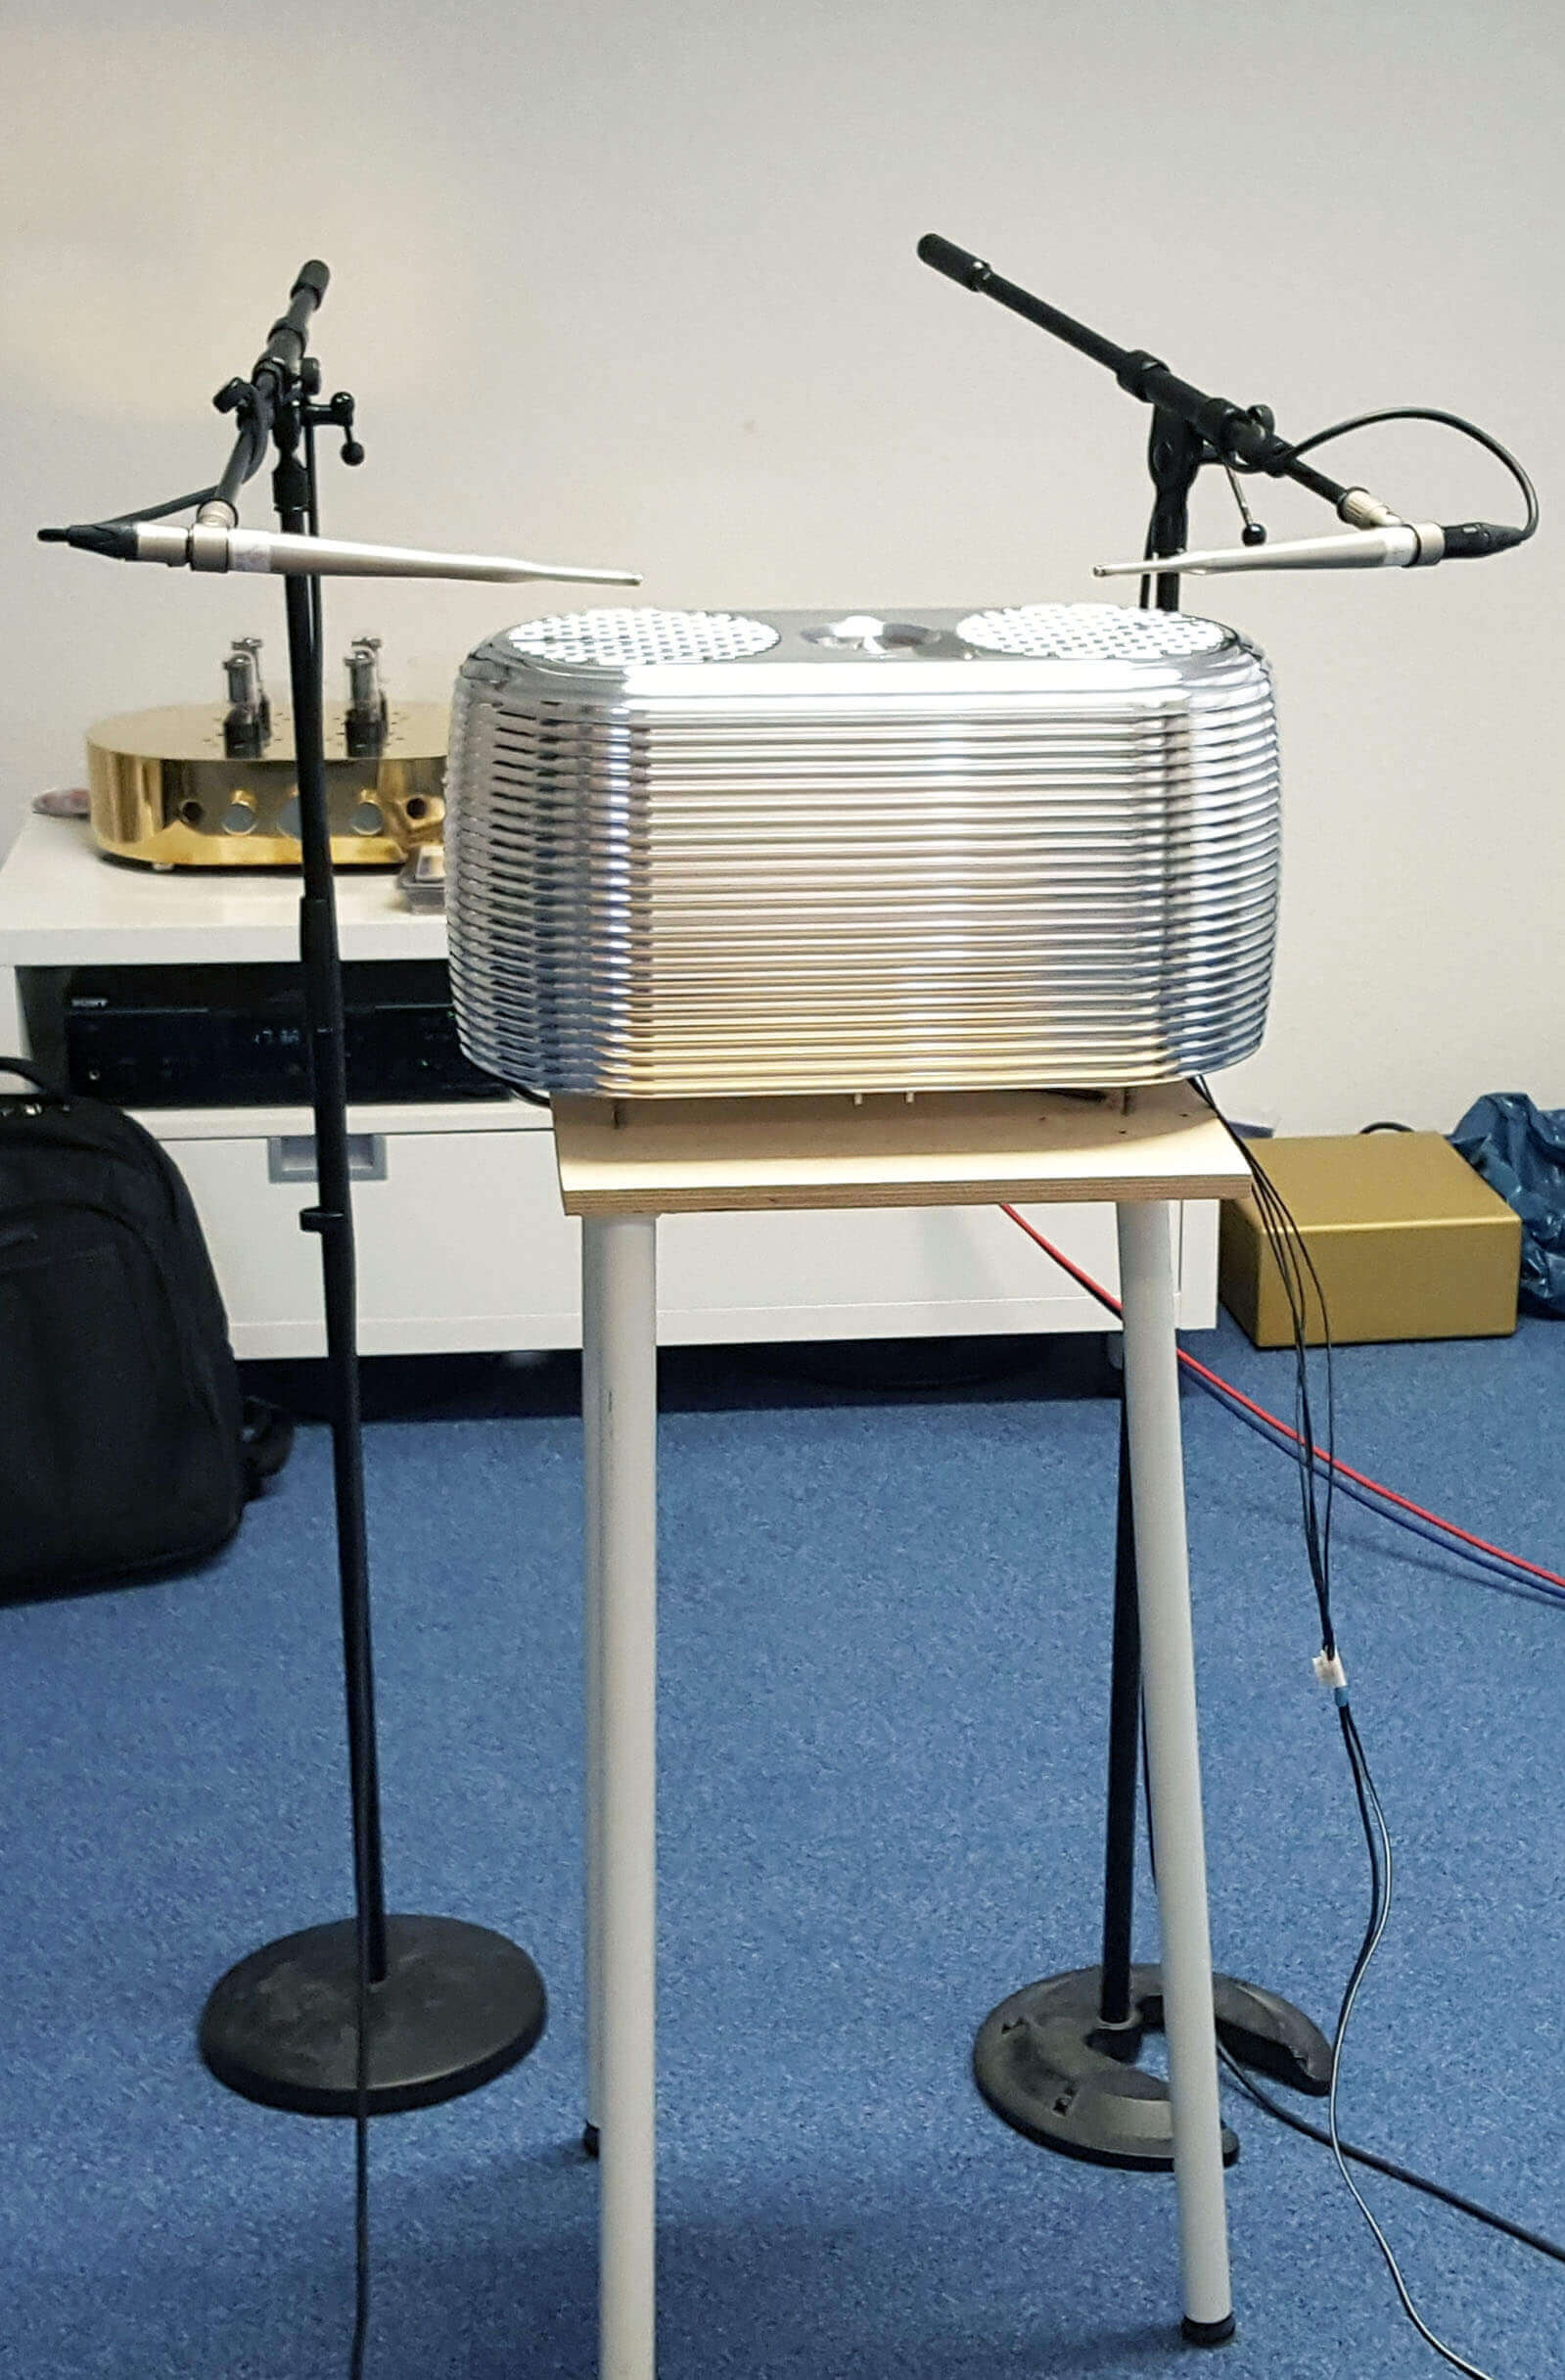
Nearfield QC measurement setup of a monitor loudspeaker
b) Documentation
Every measurement procedure in each phase of the production must be documented in a clear and unambiguous manner, making it executable by any technician in the company. When a measurement is performed, the data shall be logged with the serial number of the device or system under test. This allows comparison of results in case of a repair and also indicates the quality of the products over the course of time. Having a complete and traceable set of significant measurement data for each product ever shipped is an important and valuable asset to a company.
c) Calibration
To ensure the accuracy of the measurement system, all relevant devices such as the audio analyzer and the measurement microphone should be calibrated according to the manufacturer’s recommendation. Measurement microphones are sensitive to temperature and humidity changes. Therefore a more frequent periodic calibration with a microphone calibrator is advised.
Wrap Up
• Objectivity over Subjectivity
• Consider the complete signal path including the listening room
• Consistent measurement strategy over product life cycle
• A suitable audio test system covers all requirements
• Complete documentation is an asset to company.
Links relevant to this topic: